
From install to first conversation
Meet your new
website assistant.
Follow these steps to connect your AI account, choose an avatar, and get your assistant ready for visitors. The same setup works for Free and Pro.
Step 1
Install the plugin
In WordPress, go to Plugins → Add New Plugin → Upload Plugin. Choose the downloaded ZIP, select Install Now, then Activate Plugin.
You will find Embodied Assistant in the admin menu. Free features work without connecting a Freemius account; you can skip that optional connection. If you purchased Pro, follow its license activation prompts.
Step 2
Connect your AI provider
First, open Settings → Connectors and add the API key for your chosen provider. Keys stay on your WordPress server.
Then open Embodied Assistant → AI provider. Choose the same provider you configured in Connectors.
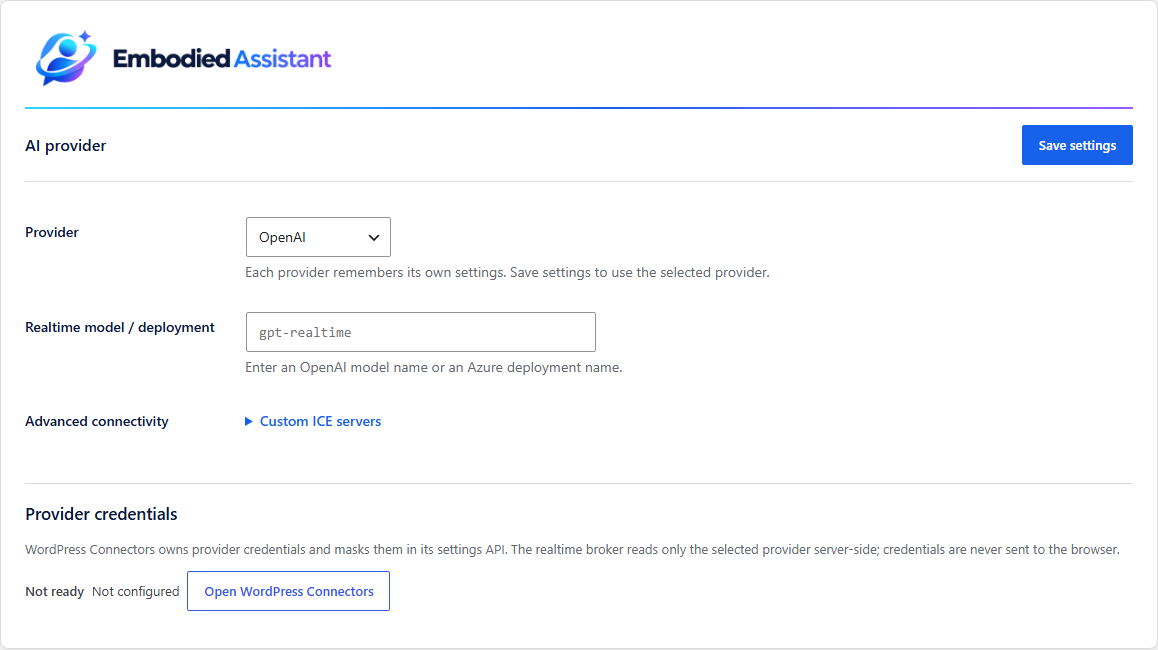
Using OpenAI
Select OpenAI and enter the compatible realtime model name available to your API account in Realtime model / deployment. Select Save settings and check the credential status on this page.
Using Azure instead?
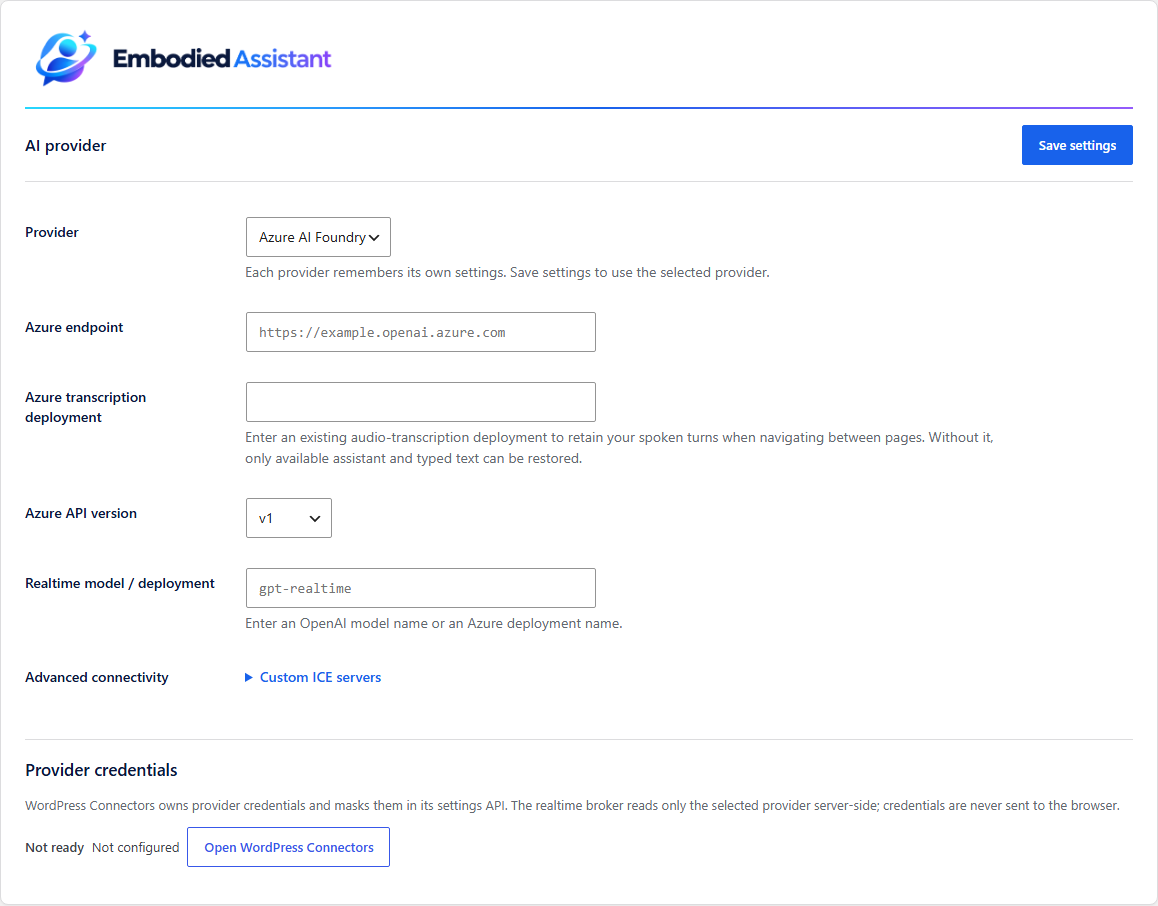
Select Azure AI Foundry. Enter your Azure endpoint, select the supported Azure API version, and enter your realtime deployment name in Realtime model / deployment. Use the name you assigned to the deployment in Azure.
If you want spoken-user history restored when visitors navigate between pages, also enter an existing Azure transcription deployment. Save settings and check the credential status.
Step 3
Choose an avatar and voice
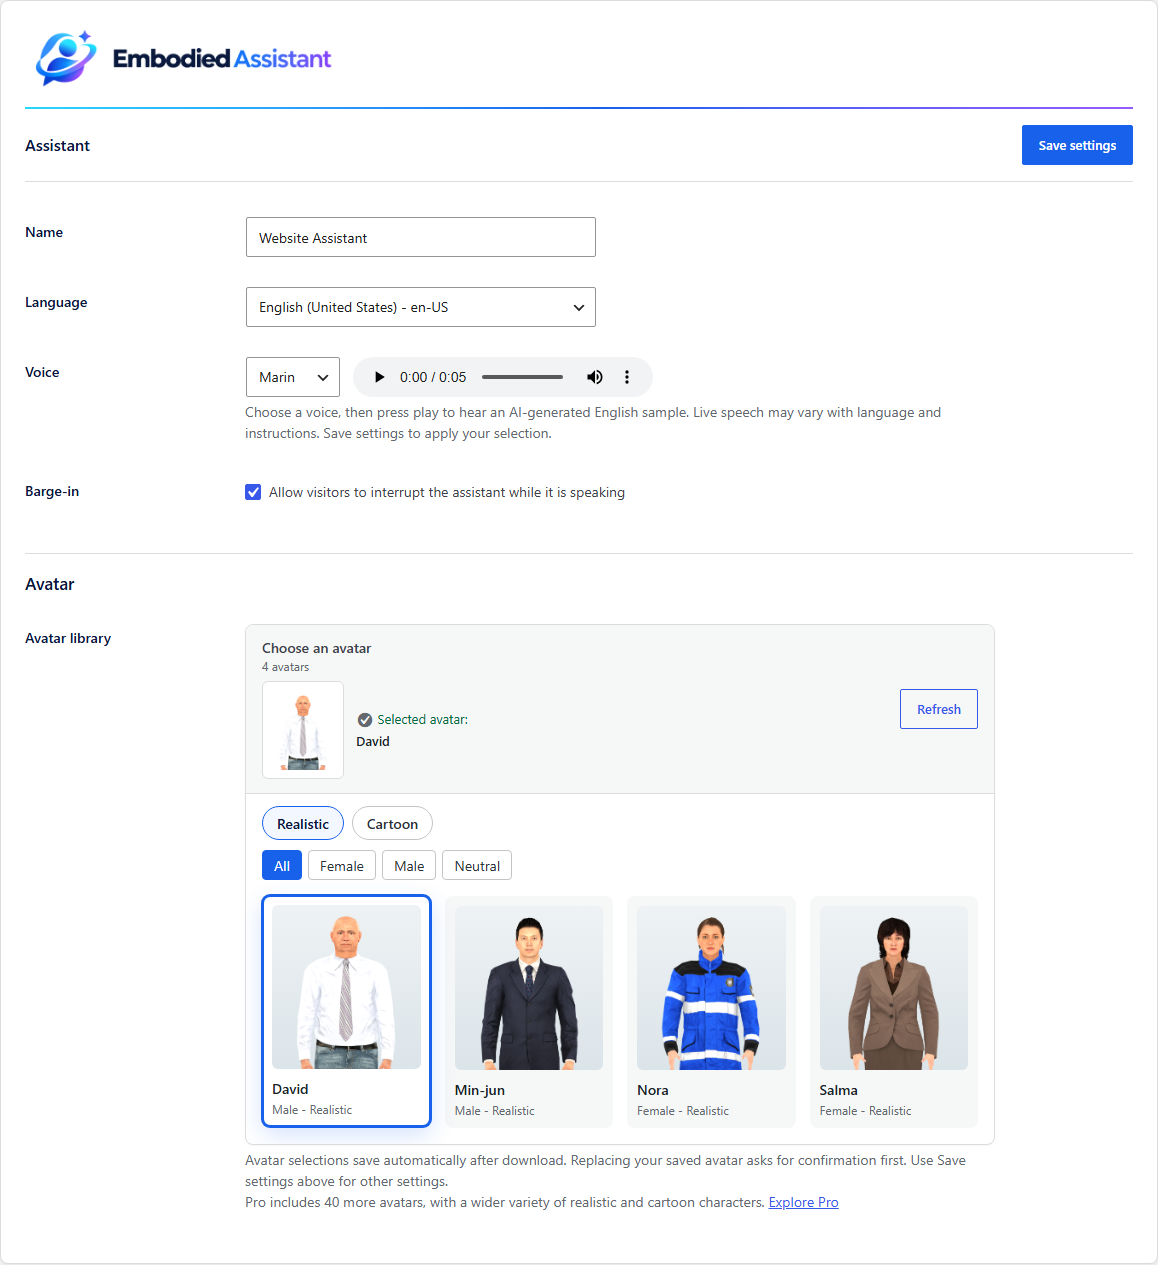
Open Embodied Assistant → Assistant. Give your assistant a name, choose its language, and select a voice. Use the audio preview to hear a sample.
Choose an avatar from the library and wait for its download to finish. Avatar selections save automatically after download; select Save settings for the name, language, and voice.
Step 4
Give it a role and useful tools
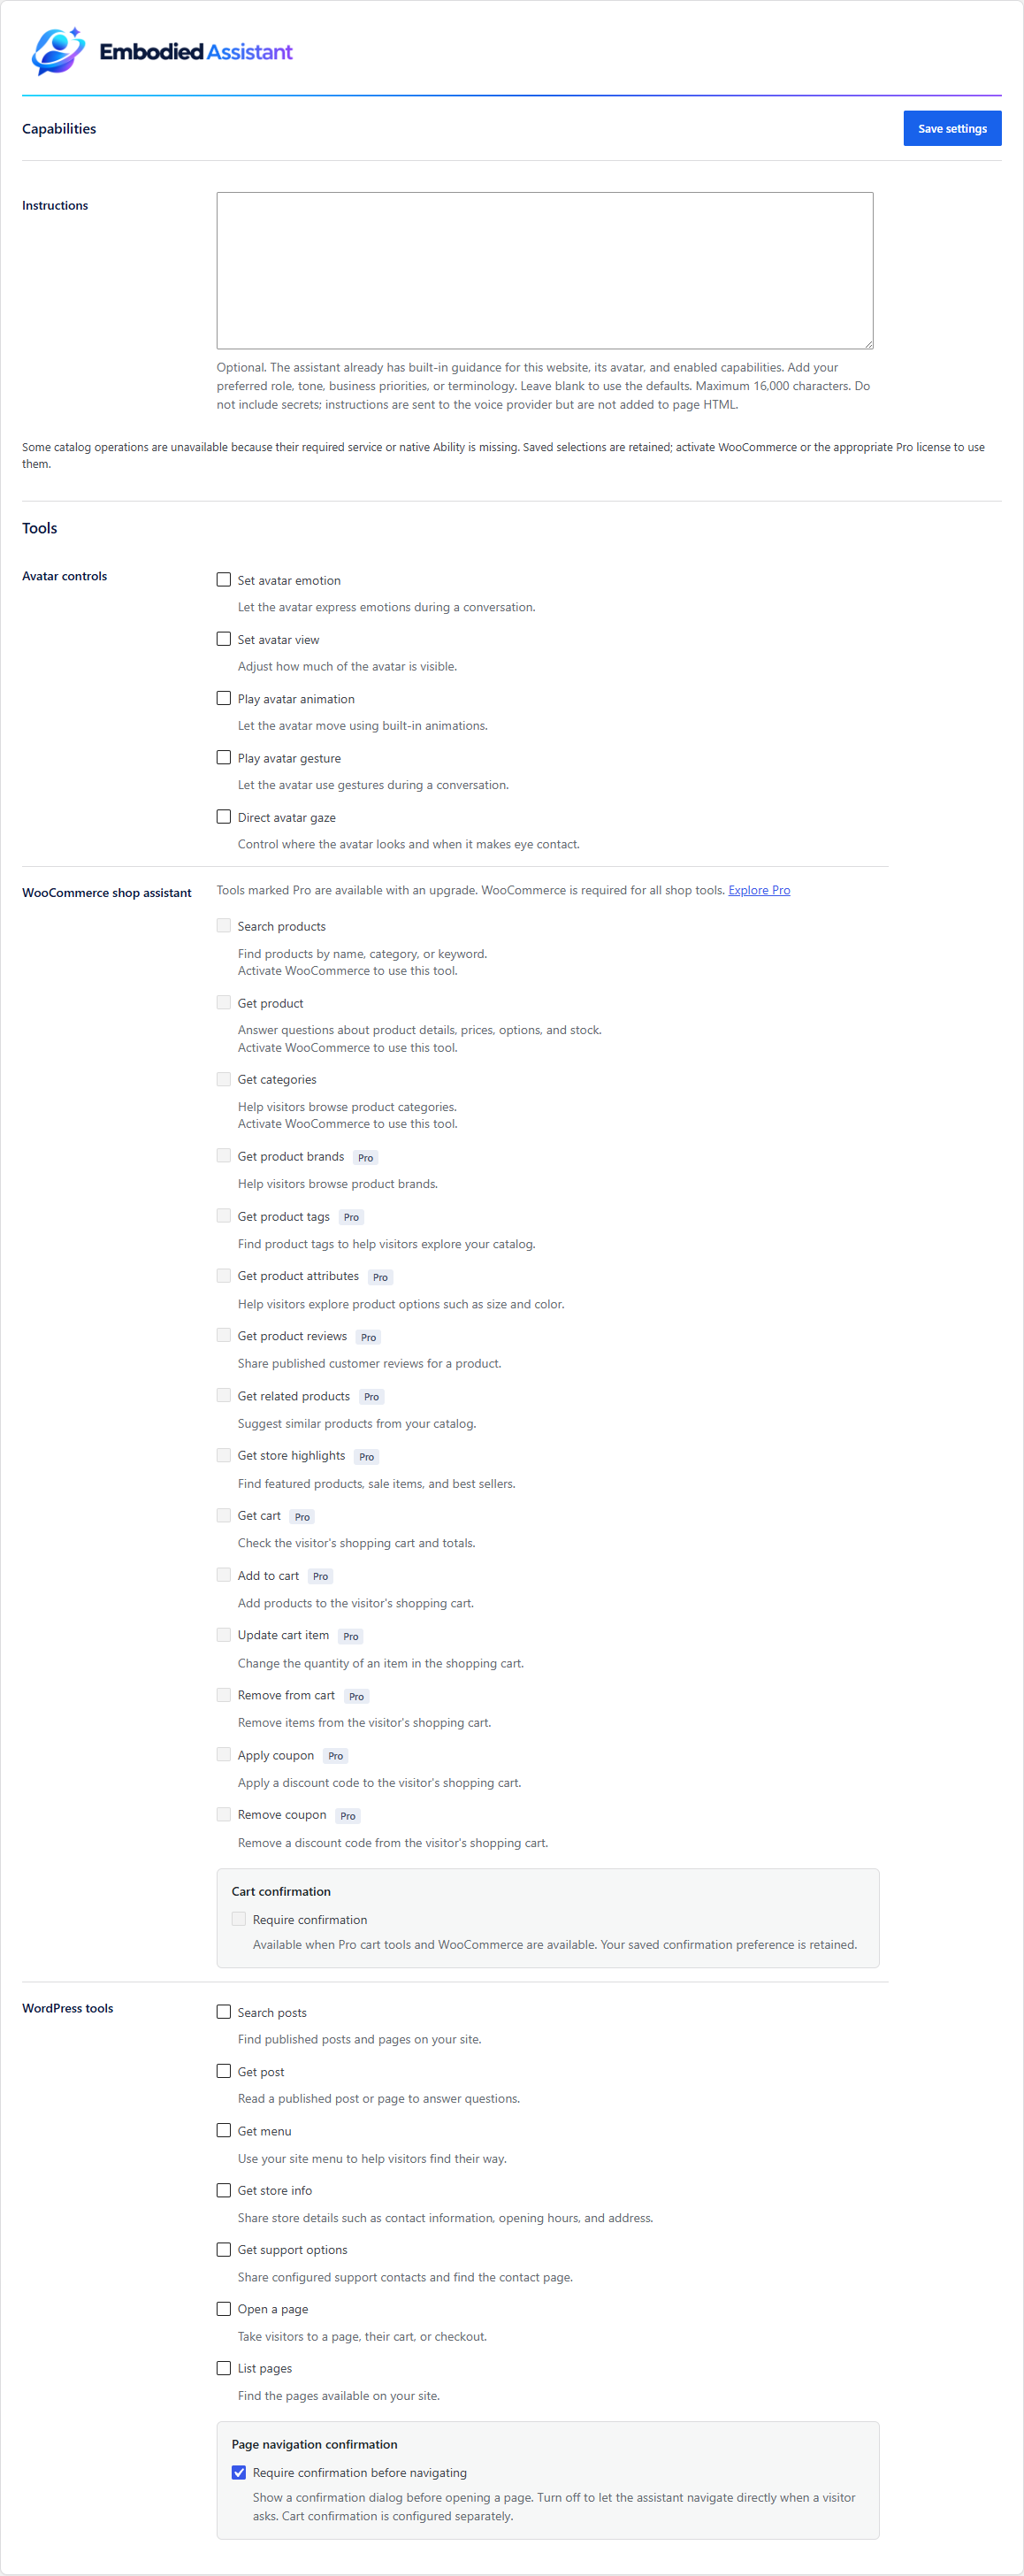
Open Embodied Assistant → Capabilities. Instructions are optional: the assistant already has built-in guidance. Add a few sentences about its role, tone, or what matters to your business.
You are our friendly website guide. Keep answers short and clear. Help visitors find relevant pages, and ask a question when their request is unclear.
Enable the tools you want it to use. For a simple website guide, start with Search posts, Get post, List pages, and Open a page. Keep navigation confirmation enabled if you want visitors to approve page changes. Select Save settings.
Tools are disabled until you select them. Store tools require WooCommerce; cart and coupon actions also require Pro with an active license.
See the instructions and tools settings
Step 5
Decide where it appears
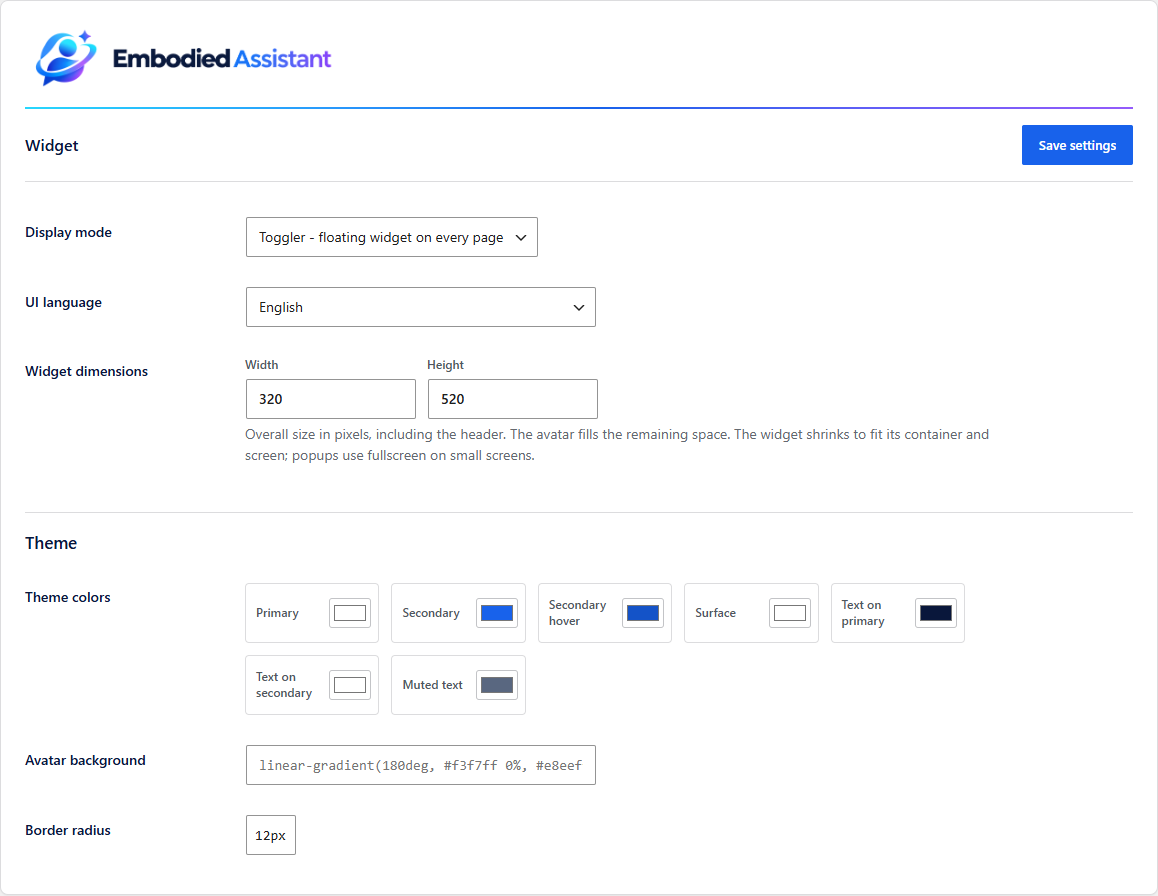
Open Embodied Assistant → Widget. For a straightforward start, choose Toggler – floating widget on every page. Visitors open the assistant using its floating button. Save settings.
You can also adjust the widget dimensions, interface language, and colors here.
Want the assistant inside a specific page?
Choose Embedded or Embedded compact and save. Edit your page, add the Embodied Assistant block or a Shortcode block containing [embodied_assistant], then publish or update the page.
Plain Overlay also needs the block or shortcode. Overlay with toggler appears site-wide. The Widget settings choose the display mode; the block or shortcode chooses placement.
Step 6
Set limits and enable it
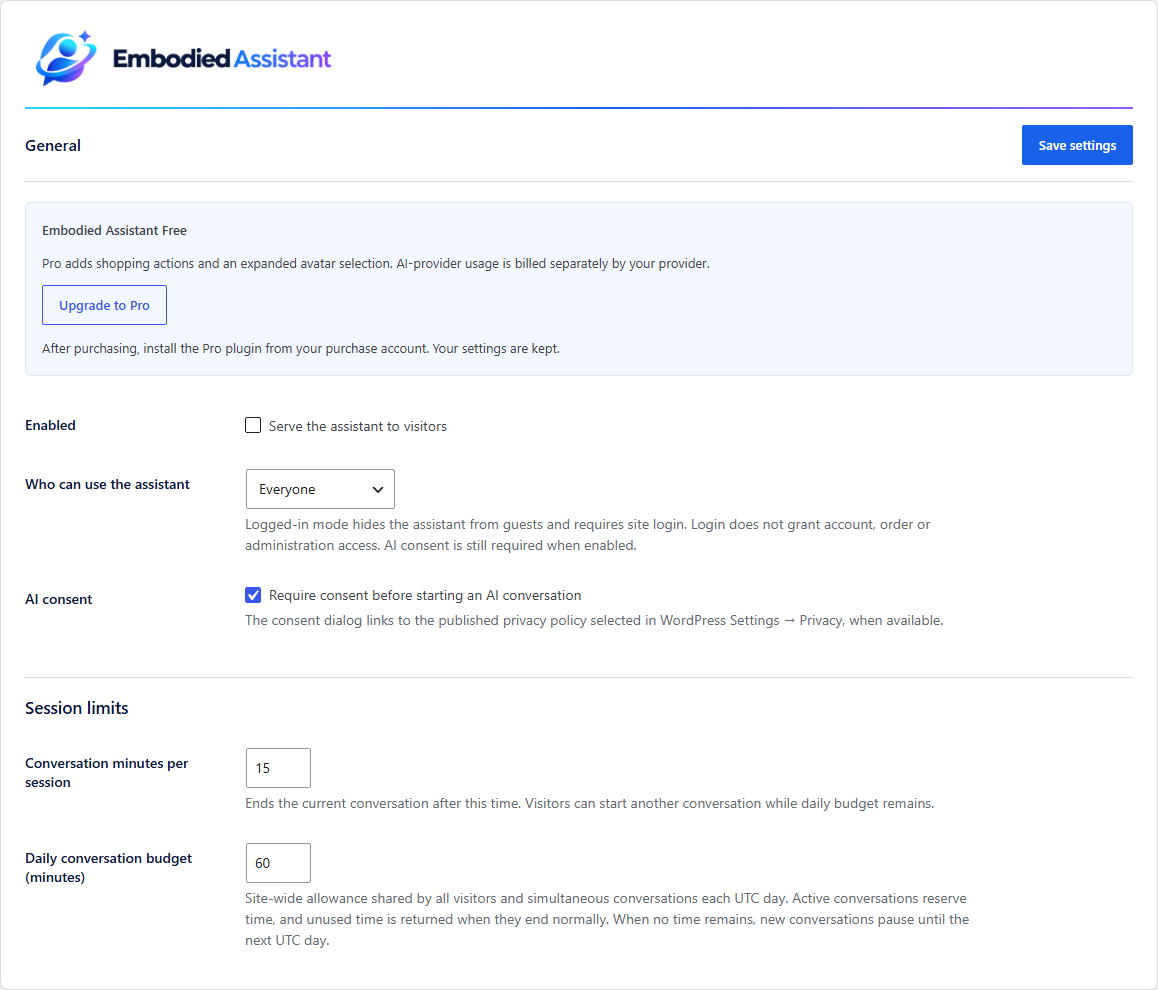
Open Embodied Assistant → General. Choose Everyone or Logged-in visitors under Who can use the assistant.
Review AI consent, conversation minutes per session, and the daily conversation budget. The daily allowance is shared across all visitors and resets each UTC day. These are time limits; provider charges are billed separately.
With consent enabled, visitors must agree before starting. Select your published policy under Settings → Privacy to include its link in the consent dialog.
Check Serve the assistant to visitors and select Save settings.
Step 7
Try it as a visitor
- Open a public page on your site. If you chose logged-in visitors, stay signed in.
- Open the floating assistant, or visit the page where you placed its block.
- Start a conversation, accept consent when prompted, and allow microphone access to speak. Use the typing control if you prefer text.
- Ask it to find a page on your site. Check that the enabled tools and any confirmation prompts behave as you expect.
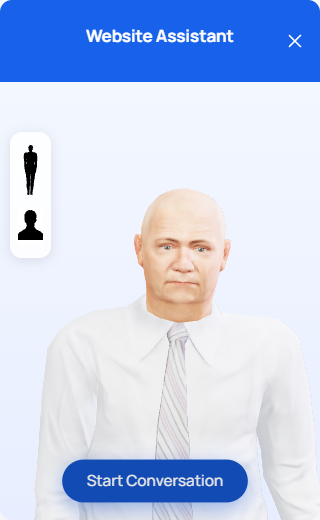
Your avatar should load, and a configured AI provider should reply. After changing settings, end the conversation and start a new one to test the changes.
A few quick checks
Something not working?
The assistant does not appear
Check Serve the assistant to visitors under General and make sure the audience includes you. Confirm the avatar download has finished. Embedded and plain Overlay modes need the block or shortcode on the page. Refresh the public page after saving.
The avatar appears, but a conversation will not start
Check the credential status under AI provider, confirm the provider matches your Connector, and verify the model or Azure deployment name and available API billing. Check that the daily conversation budget has time remaining.
Voice or website actions do not work
Use HTTPS or localhost, allow microphone access in your browser, and check your microphone and speaker settings. For website actions, check the relevant tools under Capabilities. WooCommerce tools need WooCommerce; Pro tools also need an active Pro license. Start a new conversation after saving changes.
Still need help? Contact us with the step you reached and any error message.